Unity Pixel Art Import Settings - Crisp Sprites in Minutes
Configure Unity to render pixel art sharply with correct sprite import, camera, and project settings.
If your pixel art looks blurry or uneven in Unity, this guide shows the exact import, project, and camera settings to render sprites razor-sharp at any scale.
Using AI to generate your sprites? See the generator: https://www.spritecook.ai/ai-sprite-generator
Who this is for
- Unity 2D (URP or Built‑in) projects with pixel art sprites (e.g., 32×32, 48×48, 64×64)
- Teams who want consistent, crisp visuals across resolutions
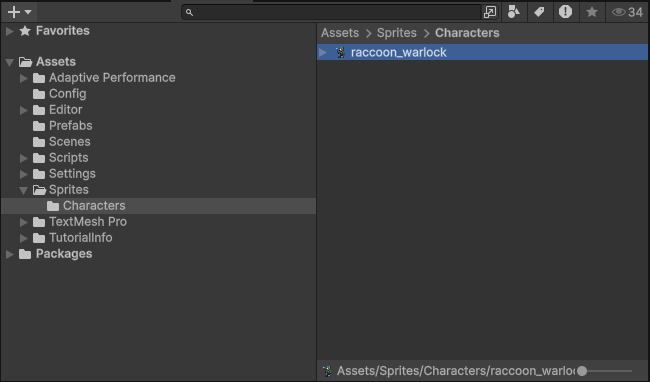
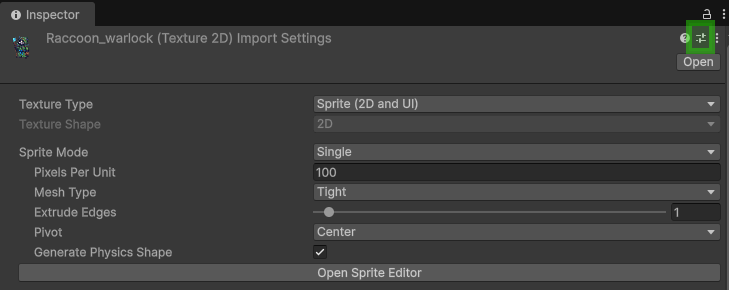
1) Texture Importer settings (per sprite)
Open a sprite and set in the Inspector:
![]()
- Drag the PNG into your Project to import.
- Texture Type: Sprite (2D and UI)
- Sprite Mode: Single (or Multiple if using sprite sheets)
- Pixels Per Unit (PPU): match your art scale (e.g., 32 or 64)
- Mesh Type: Full Rect
- Filter Mode: Point (no filter)
- Compression: None (or Low Quality if VRAM constrained; None recommended)
- Max Size: >= native size of your sprite sheet
- sRGB (Color Texture): On
- Generate Mip Maps: Off
- Wrap Mode: Clamp (or Repeat for tiles that need it)
Apply to your sprites or sprite sheets. For multiples, select all sprites and apply once.
2) Project Quality settings
- Edit → Project Settings → Quality:
- Anti Aliasing: Disabled (0×)
- Anisotropic Textures: Disabled (for pixel art)
- If using URP: ensure the URP Asset uses Point filtering for relevant renderers or materials
3) Pixel Perfect Camera
Install the Pixel Perfect package and add the component:
- Window → Package Manager → 2D Pixel Perfect
- Add the Pixel Perfect Camera component to your main Camera
- Set:
- Assets Pixels Per Unit: same as your sprite PPU (e.g., 32 or 64)
- Reference Resolution: choose your target (e.g., 320×180 for 16:9, or 640×360)
- Upscale Render Texture: On (common for crisp scaling)
- Pixel Snapping: On
- Crop Frame: Pillarbox or Letterbox (optional, prevents fractional scaling)
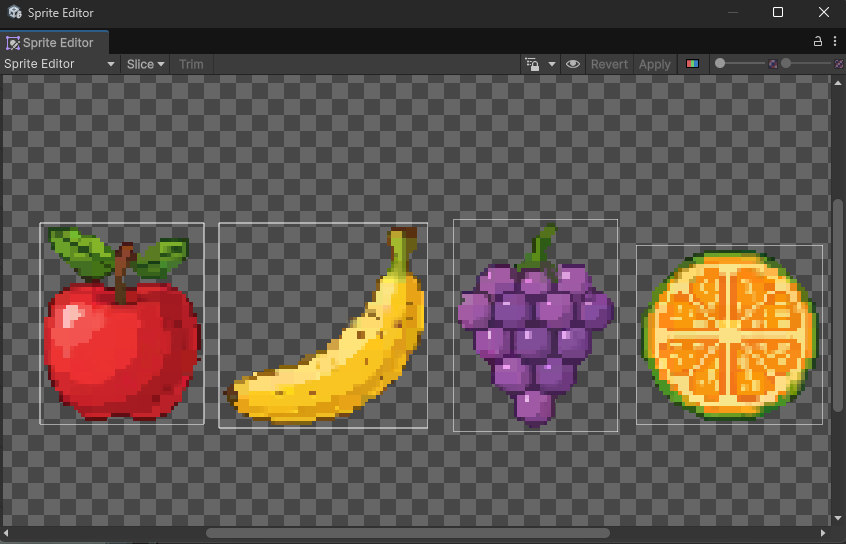
4) Slice sprite sheets (optional)
If your image contains multiple sprites/frames:
![]()
- Set Sprite Mode: Multiple, open Sprite Editor
- Slice by Grid (e.g., 32×32, 64×64)
![]()
4) Material filtering (URP/Built‑in)
If you apply custom materials/shaders:
- Ensure sampling is Point/Nearest
- Avoid post‑processing that blurs (TAA, FXAA)
- In Shader Graph or custom shader, avoid filtering steps intended for 3D textures
5) Sprite Atlas (optional)
Pack sprites into an atlas for fewer draw calls:
![]()
5) Scene scale and snapping
- Keep transform scales at 1,1,1 for sprites
- Grid and Snap: enable snapping to whole units matching PPU alignment
- Avoid fractional pixel offsets (the Pixel Perfect Camera helps avoid sub‑pixel rendering)
6) Testing at multiple scales
- Test game view at 1×, 2×, 3× zoom
- Check diagonal lines and outlines for blur/flicker
- Validate sprites with transparency render correctly over all backgrounds
Bonus: Save an Import Preset
Export your importer settings to reuse quickly:
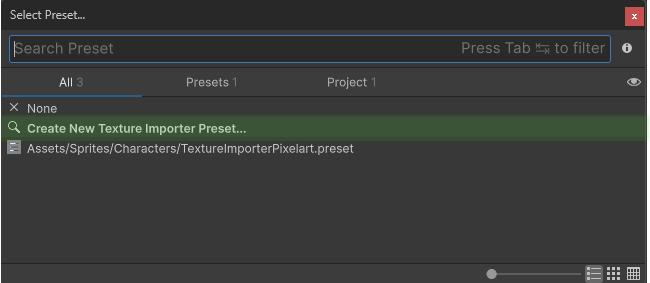
Download a ready-made preset:
- Local:
/assets/downloadables/PixelArtImportSettings.preset - Web: https://www.spritecook.ai/assets/downloadables/PixelArtImportSettings.preset
Common pitfalls
- Sprite PPU doesn’t match Pixel Perfect Camera PPU → soft/blurry edges
- Mip Maps enabled → blurry downscales
- Anti‑aliasing on → faint smearing on edges
- Non‑integer scales or canvas sizes → uneven pixel rows/columns
Related
- Generate consistent sprites with AI: https://www.spritecook.ai/ai-sprite-generator
- Animating Sprite Sheets - Tips for Consistency (coming soon)