Make a Unity autotile tileset with AI and a Tile Palette
Generate a tileset with AI, import the Unity package, and paint a tilemap from the Tile Palette that auto-fills the edge and corner tiles for you. Step by step with screenshots.
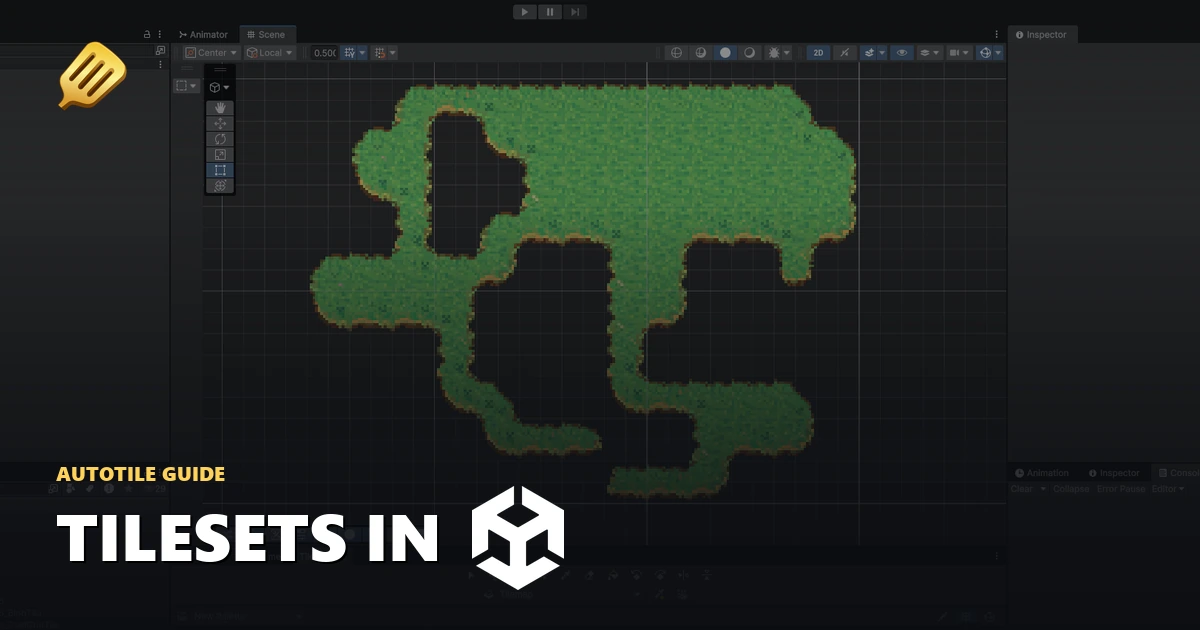
Once you've generated a 15-piece tileset, the Unity export packs it as a .unitypackage with the autotile asset already wired up. Import it, drop the autotile into a Tile Palette, and paint. Unity fills in the matching edge and corner tiles as you go.
Here's the full path from export to painting.
Export the Unity package
Open your tileset in the fullscreen viewer and hit Export. Set Engine file to Unity and download the .unitypackage.
In Unity, import it through Assets > Import Package > Custom Package..., pick the downloaded file, and import everything. You'll get a SpriteCook folder in your project with the textures and the autotile assets.
Create a tilemap
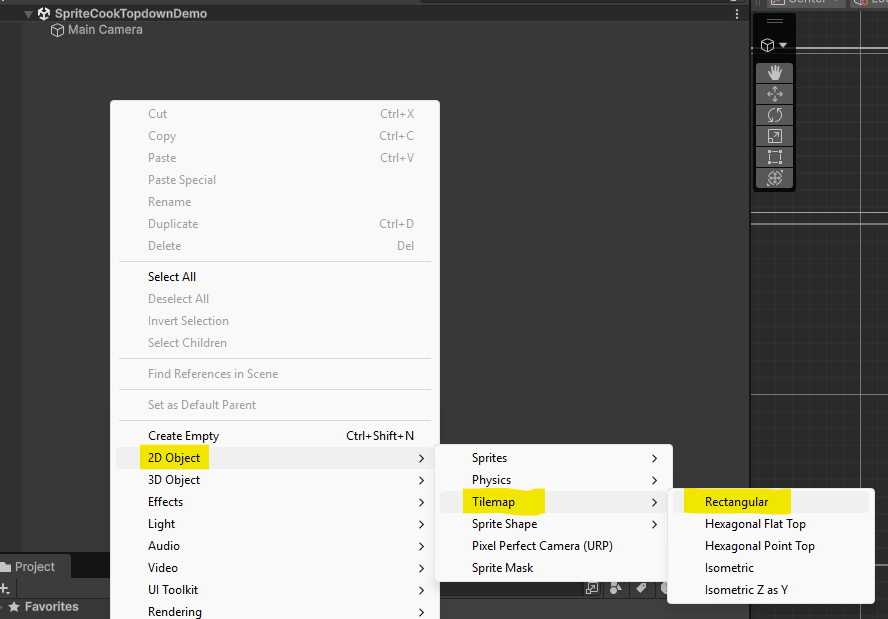
Right-click in the Hierarchy and choose 2D Object > Tilemap > Rectangular. Unity makes a Grid with a Tilemap child. Select the Tilemap whenever you want to paint onto it.
Open a Tile Palette
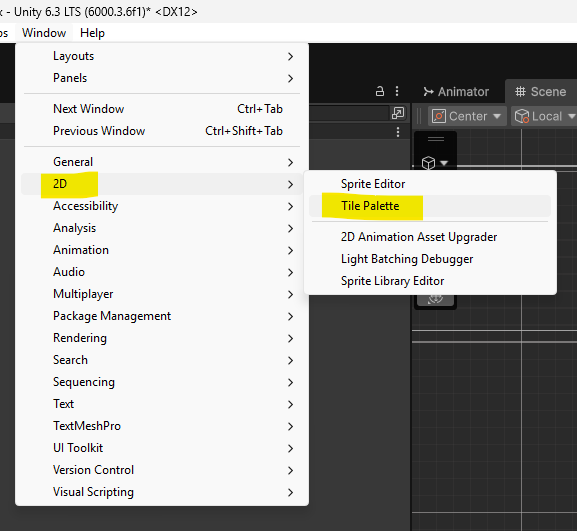
Open the Tile Palette window from Window > 2D > Tile Palette.
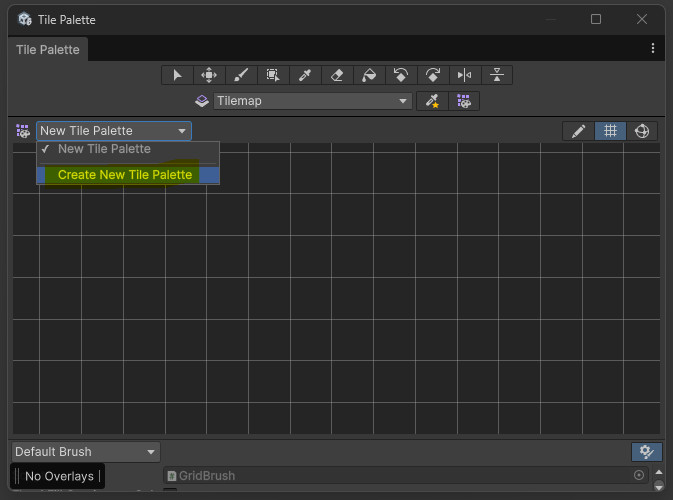
In the palette window, create a new palette and choose where to save it.
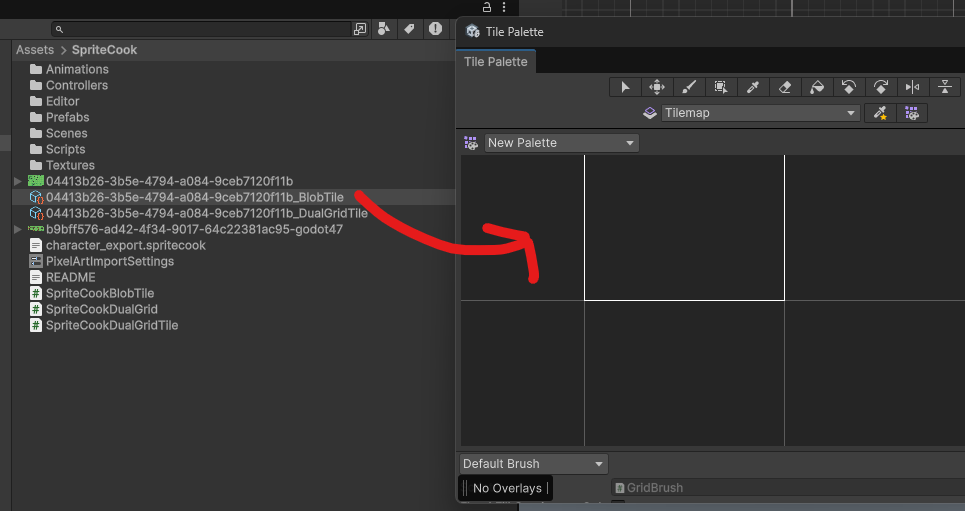
Add the autotile
Drag the autotile asset from the SpriteCook folder into the palette. Use the tile asset (the BlobTile), not the raw PNG. The PNG paints fine but it won't do the automatic transitions.
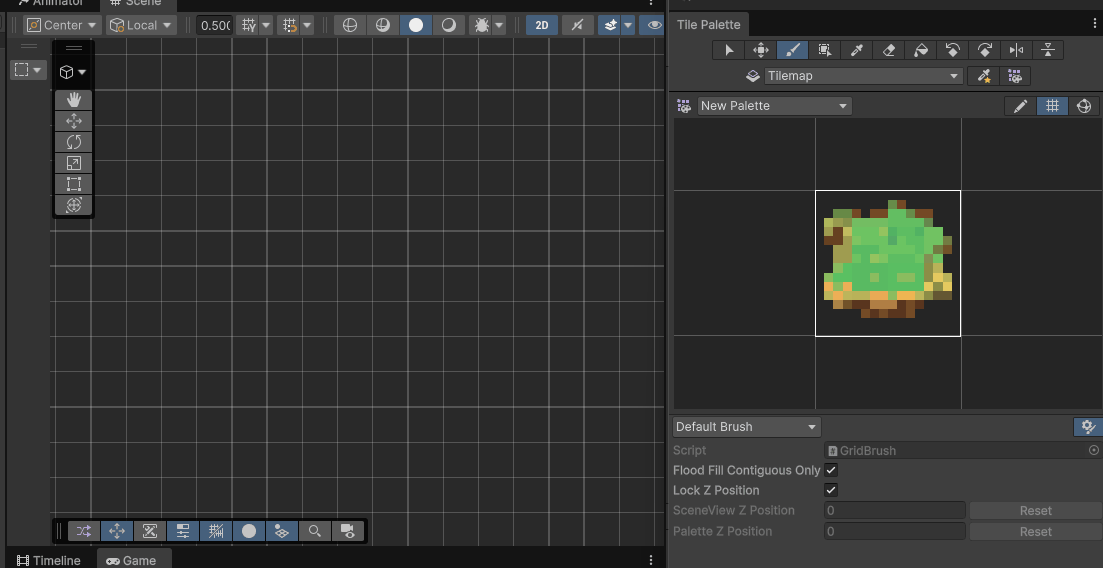
Paint with autotile
Select the Tilemap in the Hierarchy, select the autotile in the palette, grab the brush, and paint in the Scene view. Unity updates the surrounding transition tiles as you draw.
Crisp pixels
If the tiles render blurry, the import, camera, and project settings that keep pixel art sharp are in the Unity pixel art import settings guide.
Try it
Generate a tileset in /create, export the Unity package, and paint a map.