Dual-grid tilesets, explained
Why autotiling on one grid needs 47 tiles, and how drawing tiles between the cells instead gets perfect corners with 15. With diagrams and the mask table.
Dual-grid tilesets, explained
You paint terrain cells, and the tilemap picks the right tile for each one. That's autotiling. The standard way of doing it needs 47 hand-drawn tiles. The dual-grid way needs 15, and the corners come out better. The whole difference is where the tiles are drawn.
This post is the deep version of how that works. If you just want the short story of what a 15-piece sheet is, start with the 15-piece autotile, explained and come back.
The single-grid approach, and where it breaks
The obvious setup puts the tiles exactly where you paint. Cell (3,5) is grass, so a grass tile gets drawn at (3,5), and which grass tile depends on the neighbors: grass to the right means no edge on the right, and so on.
How many neighbors do you check? The cheap version checks four, the cells sharing an edge:
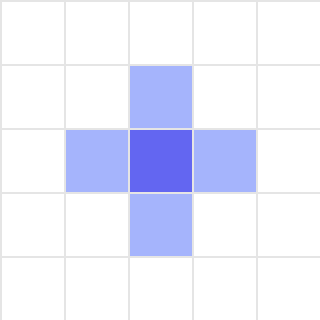
Four neighbors gives you 16 tile variants, which sounds fine until a diagonal shows up. Two grass cells touching only at a corner have identical edge-neighbor patterns as two grass cells not touching at all, so the tilemap literally cannot tell the difference. Inner corners are unsolvable with edge information alone.
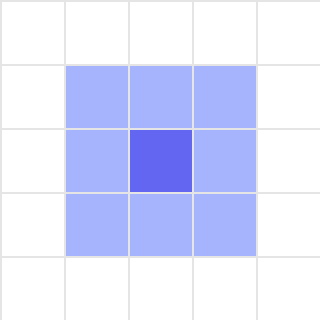
So you check all eight neighbors. Now the tilemap can see diagonals, but the combination count explodes to 256. After removing cases that look identical you're left with 47 visually distinct tiles, the classic "blob" tileset. It works. It also means drawing 47 variations of dirt, and most engines make you wire up the matching rules for every one of them.
The dual-grid idea
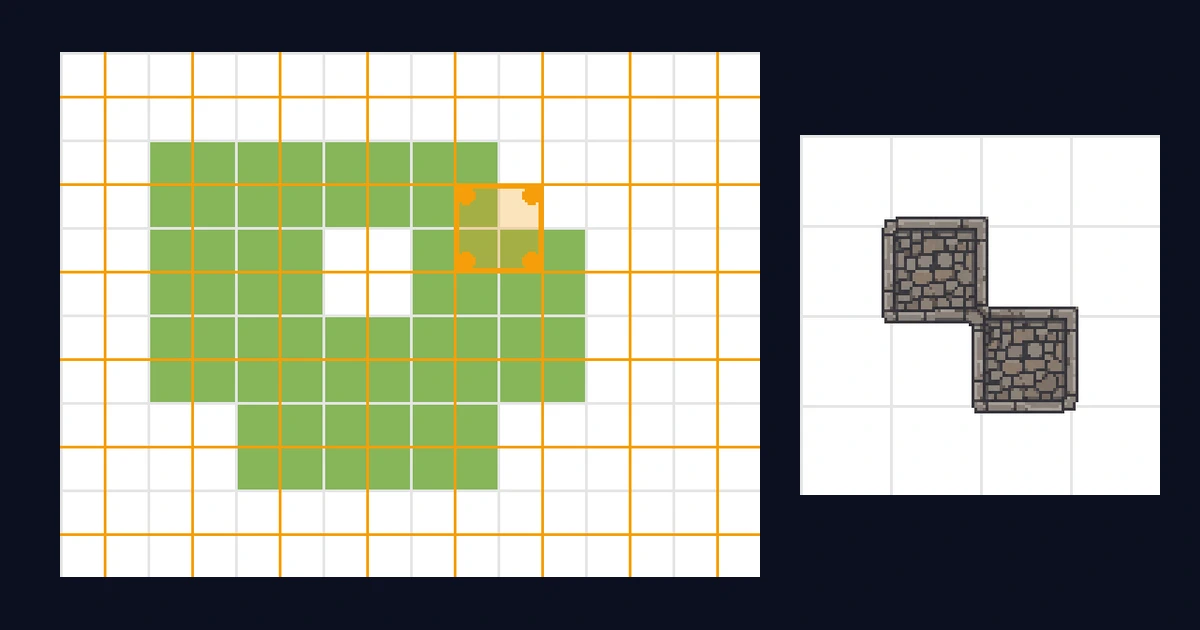
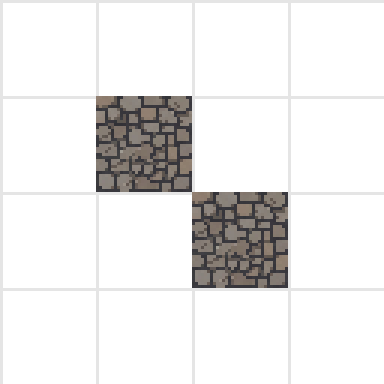
Dual grid changes one thing: the tiles aren't drawn on the cells you paint. They're drawn on a second grid, offset by half a tile, so every rendered tile sits across exactly four painted cells.
Green is what you painted. Orange is where tiles actually get drawn. The highlighted tile overlaps four painted cells, marked with dots, and those four cells are all it needs to know about: each one is either ground or not.
That's the trick. A rendered tile's corners each touch one painted cell, so its appearance is fully determined by four yes/no questions. Two options, four corners, 2^4 = 16 cases. One case is "all four empty", which draws nothing. The other 15 are the 15-piece tileset.
Compare the bookkeeping: the single-grid blob needs 8 neighbors and 47 tiles to handle what dual grid covers with 4 cells and 15 tiles. Nothing is approximated, every case is exact, the sheet is just smaller because the question is smaller.
The diagonal, solved for free
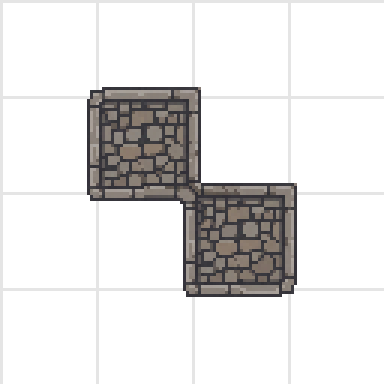
Remember the case that broke edge-matching? Two cells touching at a corner. On the dual grid, the rendered tile sitting between them samples one filled cell at its top-left and one at its bottom-right, a combination that exists in the sheet as its own piece. The diagonal isn't a special case, it's just mask number 9.
What a finished map looks like
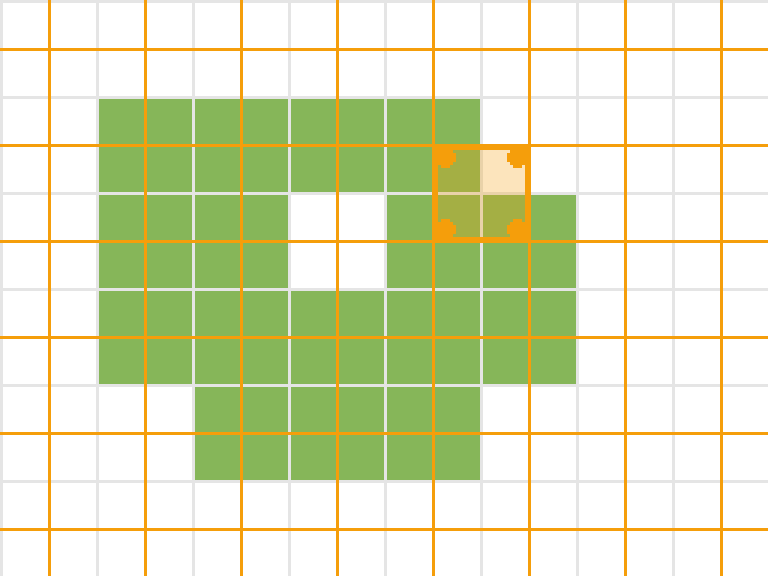
Here's a full map rendered dual-grid style, with the painted-cell grid drawn over it in green. Notice that every tile boundary sits halfway between the green lines: the art lives between the cells, which is why every edge and corner lands on a piece that was drawn for exactly that situation.
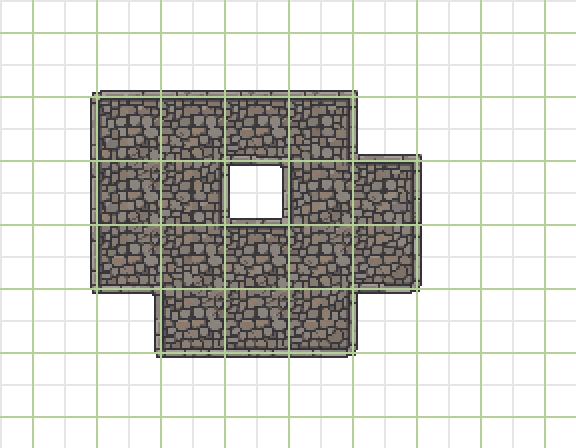
One practical consequence: the rendered map is one tile wider and taller than the painted map, because tiles also sit around the outside edge of the painted cells. If your renderer loops over the map size and the border looks chopped off, that's the missing row and column.
The mask, if you're implementing it
Each rendered tile turns its four cells into a 4-bit mask. SpriteCook's bit order:
let mask = 0
if (filled(x - 1, y - 1)) mask |= 1 // top-left
if (filled(x,     y - 1)) mask |= 2 // top-right
if (filled(x - 1, y    )) mask |= 4 // bottom-left
if (filled(x,     y    )) mask |= 8 // bottom-right
The mask picks a cell from the 4x4 sheet through one lookup table:
const frameByMask = [-1, 15, 8, 9, 0, 11, 14, 7, 13, 4, 1, 10, 3, 2, 5, 6]
const frame = frameByMask[mask] // -1 = draw nothing
const atlasColumn = frame % 4
const atlasRow = Math.floor(frame / 4)
Mask 0 draws nothing, mask 15 is the filled interior, and mask 9 is that diagonal from earlier. That's the entire runtime: no rule trees, no per-tile configuration, one table.
If you'd rather not write a renderer at all: the engine exports hand Godot, Unity, and Tiled files with the terrain matching already wired up, so the dual-grid logic only matters when you're rolling your own tilemap.
Or let your agent implement it
If you code with an AI agent, this whole post is already in its hands. The SpriteCook plugin for Claude Code, Codex, Cursor, and OpenCode ships with a dual-grid skill containing exactly this implementation: the mask order, the lookup table, the renderer. Tell your agent to add terrain to your game and it can generate the tileset and wire up this renderer in your codebase in one go. Setup takes a couple of minutes on the agents page.
Where to next
- Generate a 15-piece tileset from one prompt, every piece included
- The 15-piece autotile, explained, the shorter companion to this post
- Free 15-piece base templates to draw on or feed to the AI
- Engine walkthroughs for Godot, Unity, and Tiled