Create a Character
Go from a text prompt to a fully animated character set in one flow.
The /characters flow handles the full pipeline. You write a prompt, tweak the result, pick an animation set, and export. Everything in one place.
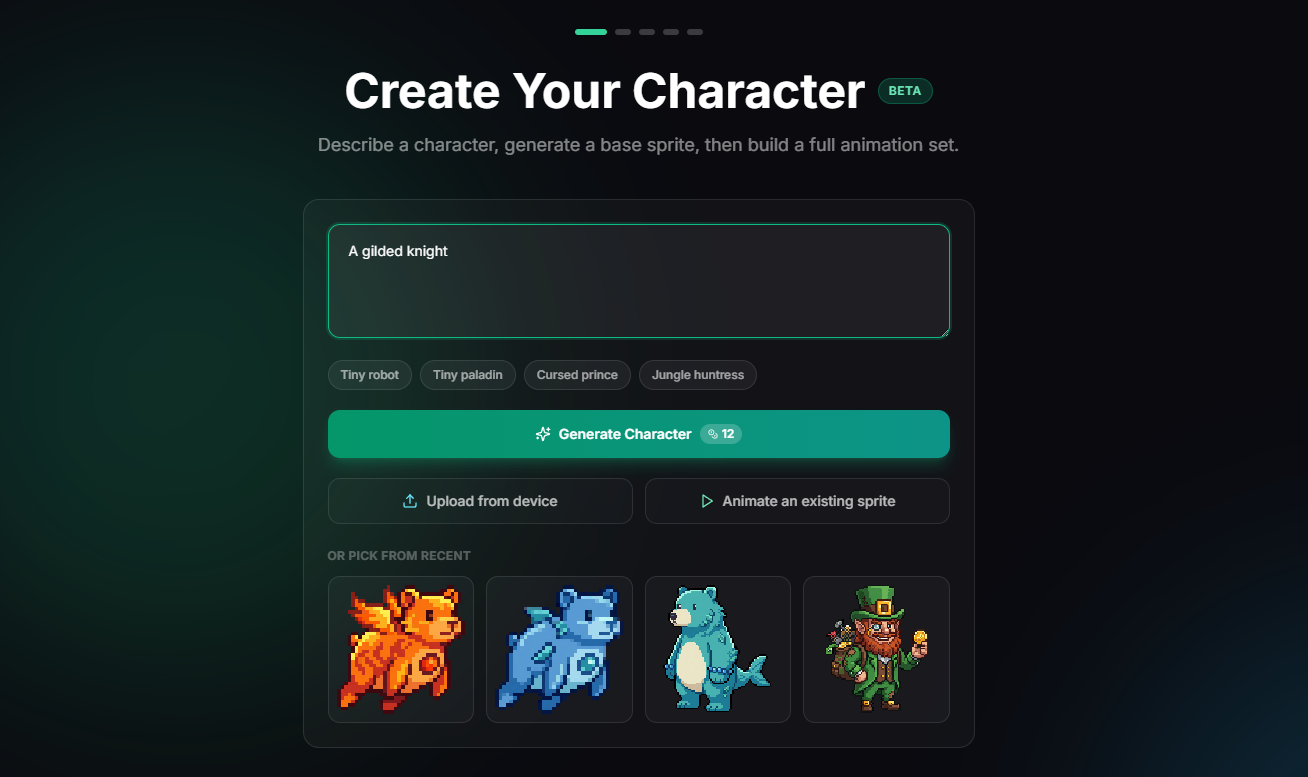
Write a prompt
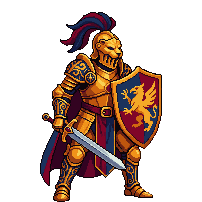
Start with a short description. You can also upload an existing sprite or reopen something from your library.
Example prompts:
- "A forest ranger hero"
- "A cyberpunk swordswoman"
- "A tiny druid with a staff"
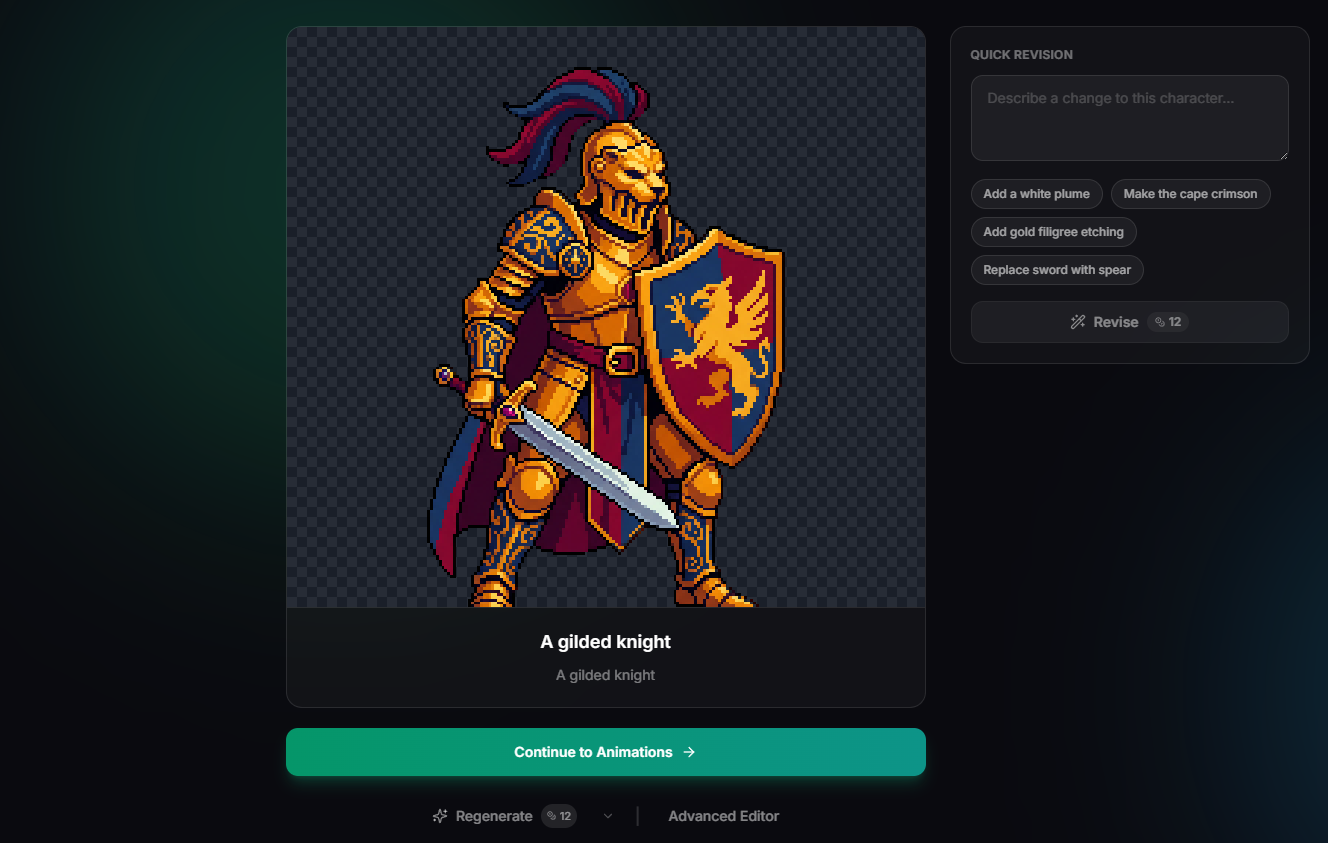
Review and revise
You get a larger preview and a revision panel. Tighten the design without starting over.
Things you can change here:
- • Heavier armor, different weapons
- • Color palette shifts
- • Silhouette and proportion tweaks
The suggested revisions help when the sprite is close and you want a few fast directions to try.
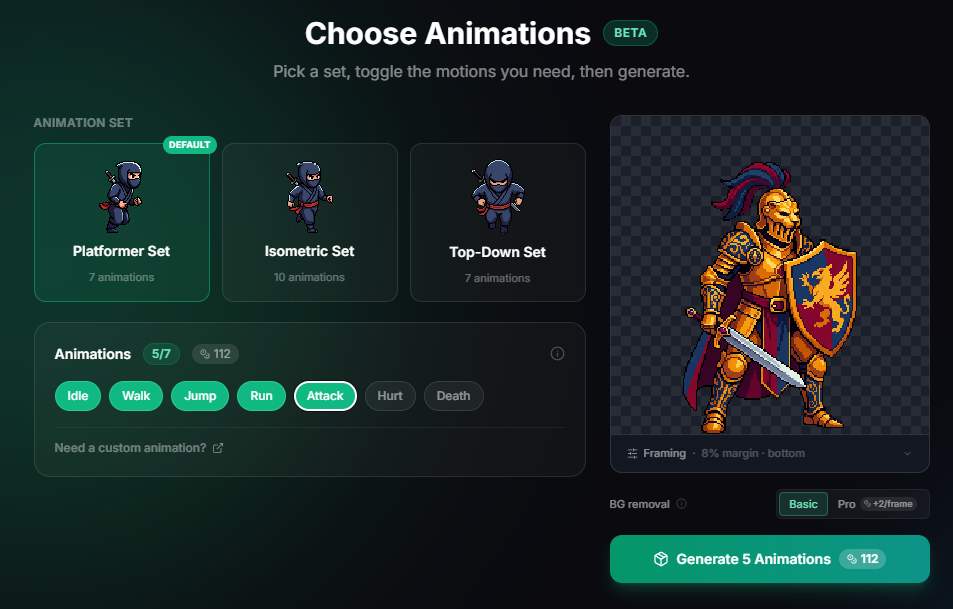
Pick an animation set
Choose the perspective that matches your game, then toggle which motions you need.


Each set starts with a default group of motions (idle, walk, run, etc.) and you can add extras. The credit cost shows before you generate, so you can start small for a prototype.
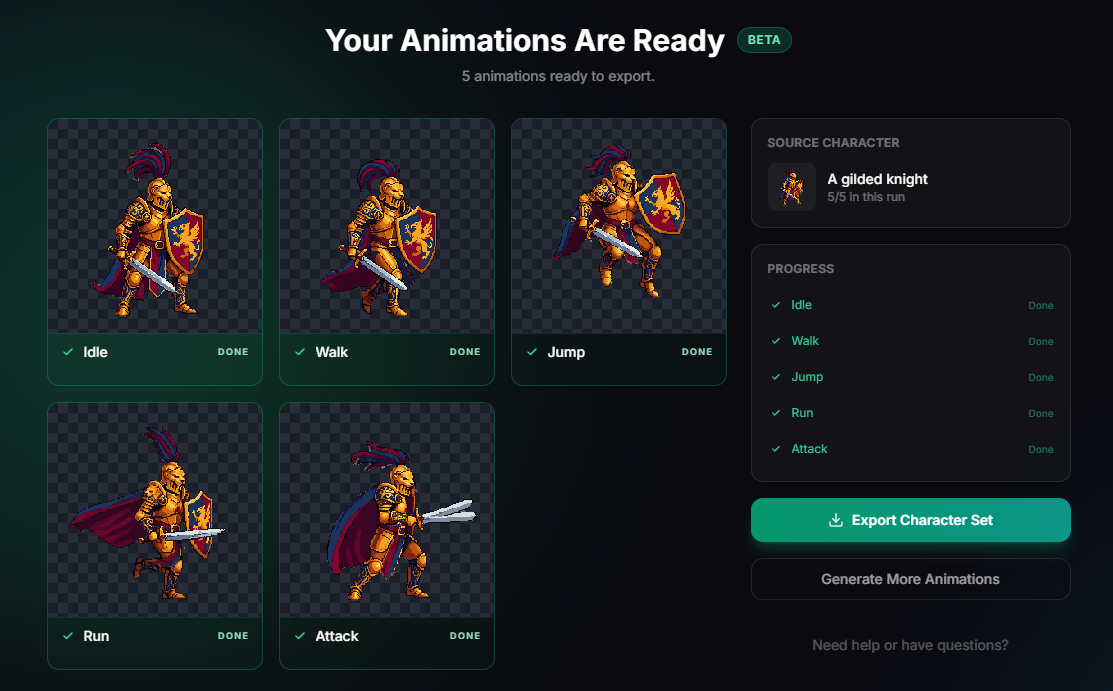
Export
Each motion appears in its own card as it finishes. Preview at true size and download when ready.
When to use something else
If you already have a sprite and only need one custom animation (a tree swaying, a chest opening), use /animate instead.
If you only need a static sprite with more control over generation settings (theme, palette, resolution), use the image editor.