Atmospheric perspective for 2D parallax backgrounds
Why stacked parallax layers look flat, and how to fix it by blending each layer toward the sky's color by distance. With the amount for each layer, a tested Godot shader and the pitfalls.
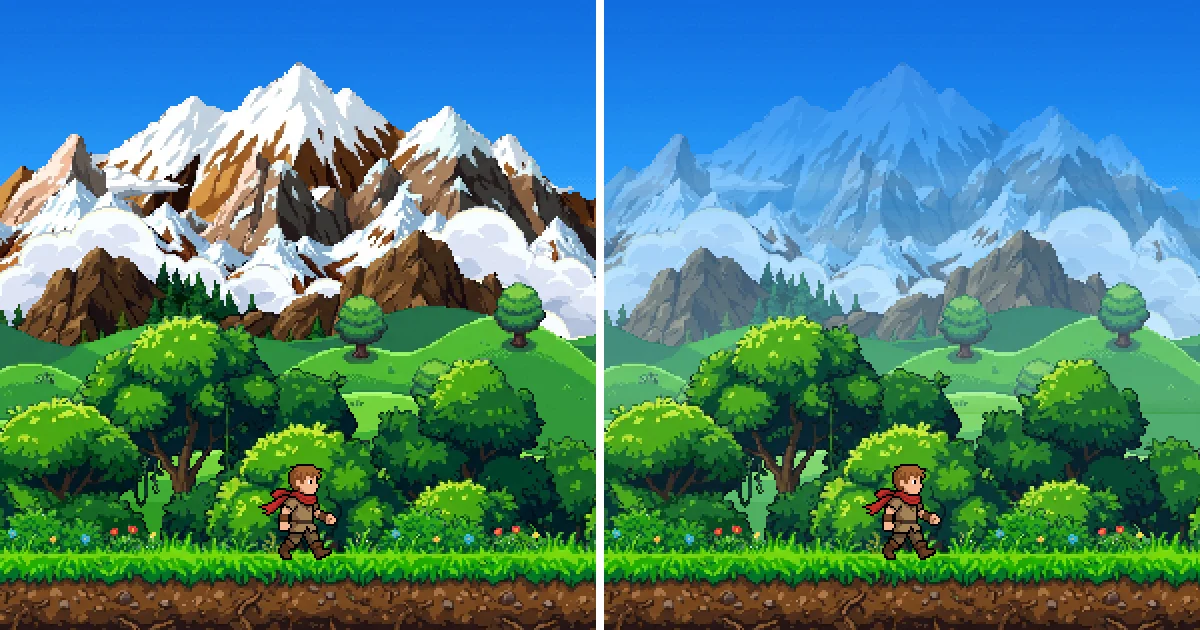
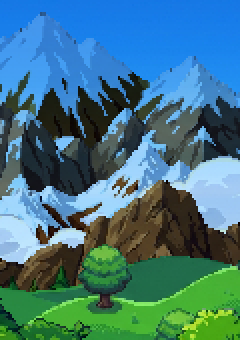
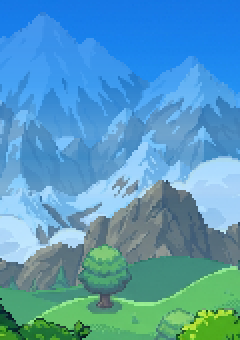
Stack a few parallax layers and the background moves with depth, but every layer is as sharp and colorful as the ground you walk on. In a still frame the far mountains look like a wall right behind the trees. Painters call the fix atmospheric perspective. The farther away something is, the more it takes on the color of the sky. In a game it's one blend per pixel, set per layer.
Same layers and the same camera on both sides. The right side blends each layer toward the sky's color, and the slider shows how strong. The layers are separate SpriteCook generations, and the hero is a pixel engine sprite with a generated walk cycle.
Atmospheric perspective vs fog
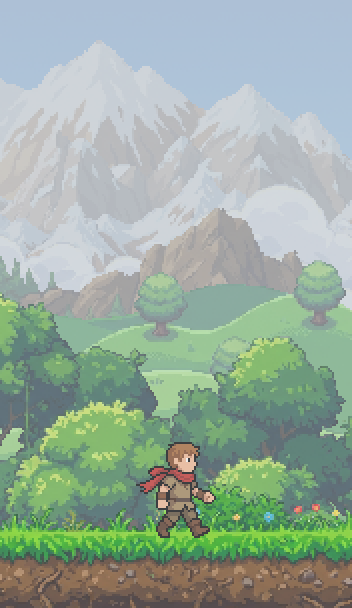
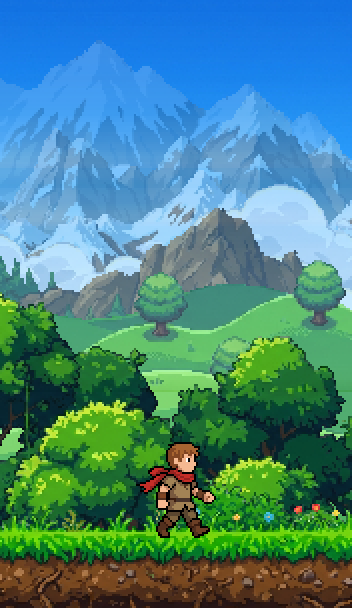
Fog is weather. It covers everything, the player too, and turns the scene gray. Atmospheric perspective is what clear air does over a long distance. Far things get lighter, softer and closer to the sky's blue, and the things near you stay as they are.
Engines make both with the same blend, usually called distance fog. Two things make it read as distance. Every pixel fades toward the sky right behind it, so the far peaks take on the blue around them. And it builds up with distance, a lot on the farthest layer and none on the one you walk on.
How much each layer gets
Each pixel fades toward the sky directly behind it, the sky's color on the same row. Give every layer an amount between 0 (as drawn) and 1 (all sky). The slower a layer scrolls, the farther away it is, so the more it gets. These are the numbers in the video, with scroll speed as the share of the camera's movement a layer moves (scroll_scale in Godot):
| Layer | Scroll speed | Amount | Extra at its base |
|---|---|---|---|
| Sky | 0.03 | none | |
| Far snowy peaks | 0.08 | 80% | +20% |
| High clouds | 0.10 | 74% | |
| Jagged range | 0.13 | 66% | +22% |
| Lower range | 0.19 | 52% | +22% |
| Cloud bank | 0.23 | 46% | |
| Forested ridge | 0.27 | 40% | +20% |
| Hills | 0.38 | 28% | |
| Trees behind the player | 0.6 | 4% | |
| Ground | 1.0 | none |
The trees right behind the player get only 4%. Any more and the area you play in looks washed out.
The mountain ranges also get extra toward their base, up to 22% more at the bottom of their art. Haze sits thickest low down, and the lighter base sets each range off against the darker top of the range in front of it.
The code
sky_colors averages every row of your sky image. add_haze takes one layer image, those row colors and the two numbers from the table. Export the layers on the same canvas as the sky, so row y of a layer sits in front of row y of the sky.
import numpy as np
from PIL import Image


def sky_colors(sky):
    """The sky's average color on every row, one color per row."""
    a = np.asarray(sky.convert("RGB"), np.float32)
    return np.floor(a.mean(1) + 0.5)                # rounded like Godot's roundi


def add_haze(layer, sky_rows, amount, mist=0.0):
    """Blend a parallax layer toward the sky right behind it.
    The layer and the sky share one canvas, so row y of the layer sits in front of row y of the sky.
    amount: 0 keeps the layer as it is, 1 turns it into the sky behind it.
    mist: extra amount at the bottom of the layer's art, fading to none at its top."""
    a = np.asarray(layer.convert("RGBA"), np.float32)
    rows = np.flatnonzero(a[..., 3].max(1) > 0)   # rows with any art in them
    top, bottom = rows[0], rows[-1] + 1
    y = (np.arange(a.shape[0]) + 0.5 - top) / (bottom - top)   # 0 at the art's top, 1 at its bottom
    k = np.clip(amount + mist * np.clip(y, 0, 1), 0, 1)[:, None, None]
    a[..., :3] = a[..., :3] * (1 - k) + np.asarray(sky_rows, np.float32)[:, None, :] * k
    return Image.fromarray(np.round(a).astype(np.uint8))
sky = Image.open("sky.png")
rows = sky_colors(sky)                     # one color per row
far_peaks = add_haze(Image.open("far_peaks.png"), rows, 0.80, mist=0.20)
Run it once when you export the layers and you're done. Do it in a shader when you want to change it while the game runs, for a storm, a sunset or a slider like the one in the video.
In Godot
The same blend as a canvas item shader:
shader_type canvas_item;

// Put this on each parallax layer's Sprite2D. The layer blends toward the sky right behind it:
// `amount` everywhere, plus up to `mist` more toward the bottom of its art.
// The layer's texture has the same height as the sky and sits at the same y, so UV.y matches the sky's rows.
uniform sampler2D sky_colors : filter_nearest;   // 1 pixel wide, the sky's color on each row
uniform float amount : hint_range(0.0, 1.0) = 0.0;
uniform float mist : hint_range(0.0, 1.0) = 0.0;
uniform float art_top = 0.0;      // UV.y where the layer's art starts
uniform float art_bottom = 1.0;   // UV.y where it ends

void fragment() {
	vec4 c = texture(TEXTURE, UV);
	vec3 sky = texture(sky_colors, vec2(0.5, UV.y)).rgb;
	float y = clamp((UV.y - art_top) / (art_bottom - art_top), 0.0, 1.0);
	float k = clamp(amount + mist * y, 0.0, 1.0);
	COLOR = vec4(mix(c.rgb, sky, k), c.a);
}
And a small script that turns the sky into one color per row, hands each layer its numbers and works out where its art starts and ends:
# hazed_layer.gd: put this on each layer's Sprite2D,
# with atmospheric_perspective.gdshader as its material.
extends Sprite2D

@export var sky: Texture2D                        # the sky layer, same height as this one
@export_range(0.0, 1.0) var amount := 0.0
@export_range(0.0, 1.0) var mist := 0.0


func _ready() -> void:
	var art := texture.get_image().get_used_rect()   # where the layer's art is
	var h := float(texture.get_height())
	material = material.duplicate()                   # every layer keeps its own numbers
	material.set_shader_parameter("sky_colors", sky_colors(sky.get_image()))
	material.set_shader_parameter("amount", amount)
	material.set_shader_parameter("mist", mist)
	material.set_shader_parameter("art_top", art.position.y / h)
	material.set_shader_parameter("art_bottom", art.end.y / h)


# The sky's average color on every row, as a texture 1 pixel wide.
static func sky_colors(img: Image) -> ImageTexture:
	var rows := Image.create(1, img.get_height(), false, Image.FORMAT_RGB8)
	for y in img.get_height():
		var sum := Vector3.ZERO
		for x in img.get_width():
			var c := img.get_pixel(x, y)
			sum += Vector3(c.r8, c.g8, c.b8)
		sum /= img.get_width()
		rows.set_pixel(0, y, Color8(roundi(sum.x), roundi(sum.y), roundi(sum.z)))
	return ImageTexture.create_from_image(rows)
To set it up:
- Put each layer in a Parallax2D node (Godot 4.3 and up) with its scroll speed as
scroll_scale. - Add a Sprite2D child with the layer's texture, and set its texture filter to Nearest for pixel art. Give every layer's texture the same height as the sky's and place it at the same y, so the rows line up.
- Give the Sprite2D a ShaderMaterial with the shader, attach
hazed_layer.gd, drag your sky texture intosky, and fill in the amount and mist from the table.
On the scene in this post, the Godot shader matches the Python version on every pixel, within 1 of 255, in Godot 4.6.
Generate the layers without haze
Image models sometimes paint haze into far mountains on their own. Our first mountain layer came back dark and blue, even though the prompt asked for bright, saturated colors. Haze painted into one layer won't match the next one, and you can't turn it down later.
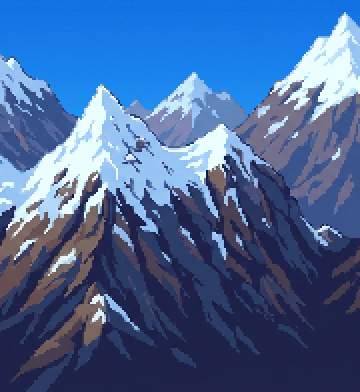
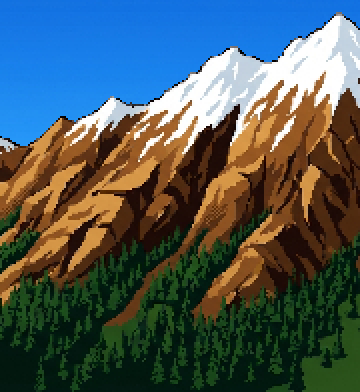
So put "no haze, no fog, no blue tint" in the prompt for every layer, and set all the depth in the engine. Use the same style line in each prompt too, so the layers look like one place. Consistent game art with AI has more on keeping separate generations in one style.
Common pitfalls
One haze color for everything. Blend toward a single color, like the pale sky at the horizon, and the far peaks end up paler than any sky you can see, because that strip of sky sits behind the mountains. They look fogged in while the air around them is clear. Blend toward the sky right behind each pixel and the far ranges take on the blue around them.
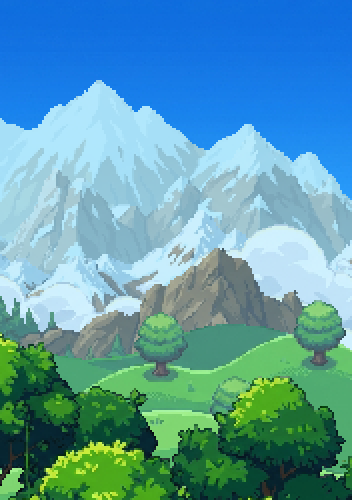
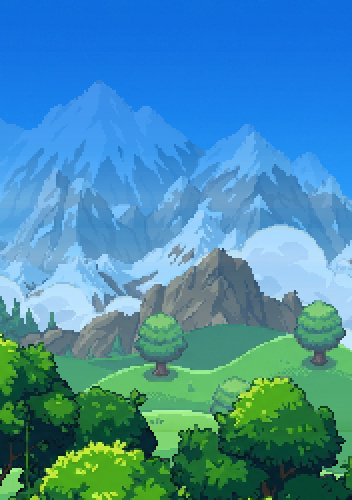
Lowering the opacity. Fading a far layer out lets the sky through, but also every layer behind it. The mountains turn into see-through ghosts with the peaks behind them showing through.
Tinting with modulate. In Godot, modulate multiplies the layer's colors. A multiply can only make things darker, so the far mountains keep their dark shadows and all their contrast. A blend (mix in the shader) pulls both the darks and the lights toward the sky, and that's what pushes them into the distance.
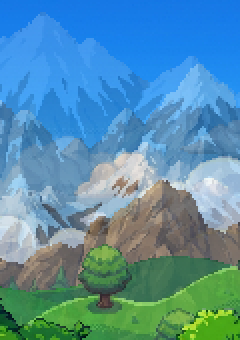
Hazing the layer you play on. Keep the ground and anything the player touches at 0. The haze is for the background, and the play area needs its full contrast.
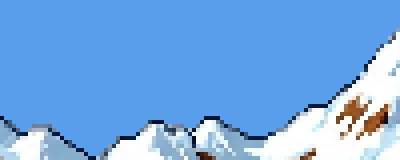
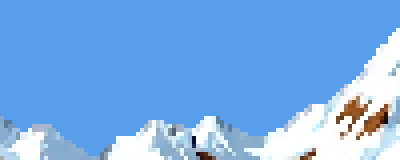
A patchy outline on the far layers. Generated layers sometimes come with a dark outline on some edges and none on others. In the distance that reads as a dotted line around the mountains. Give each edge pixel the color of the pixel next to it inside the layer, so the edges match the fill.
Where to next
- Consistent game art with AI, for keeping all your layers in one style
- Wang tiles, explained, for ground that doesn't show its tile grid
- 2D water shorelines with a distance field, another trick where one number per pixel drives the whole look
- 2D shadowcasting for torchlight, fog of war and line of sight, for the lighting in your levels