Normal maps for pixel art from the sprite's outline
How to make a normal map for any pixel art sprite from its outline, with no drawing. The steps, Python code, a tested Godot shader that keeps the light in pixel art steps, floor tiles and the pitfalls.
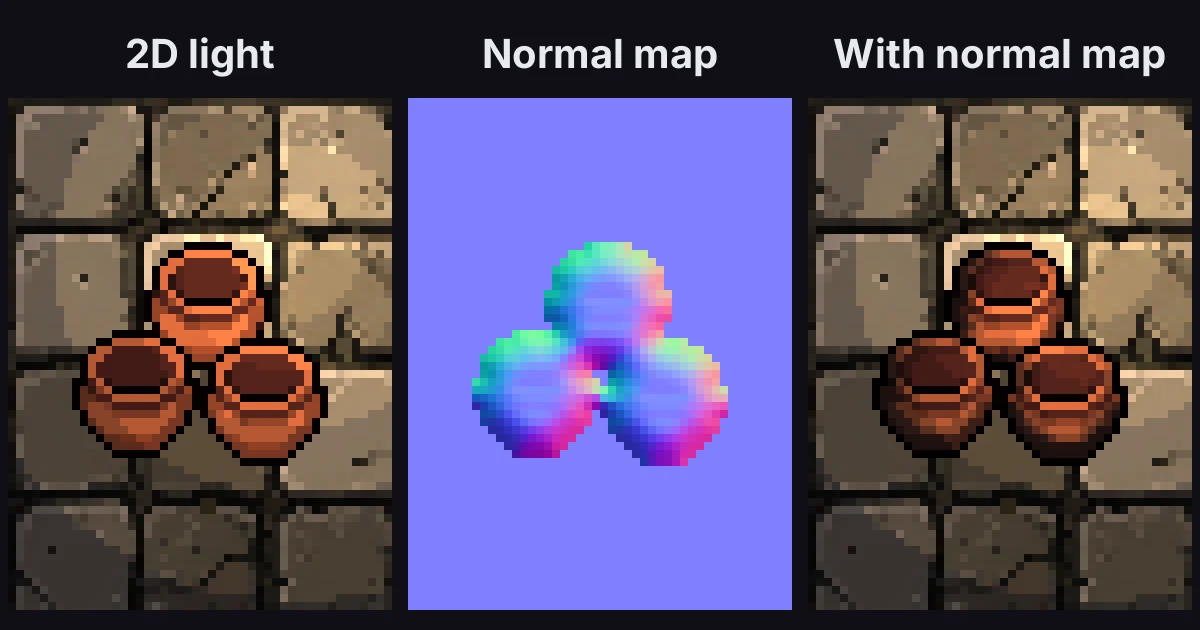
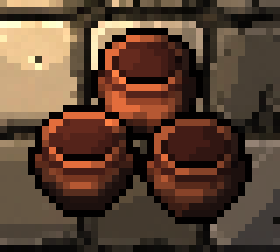
A 2D light on plain sprites brightens a circle around the torch, and that's it. Everything inside the circle gets the same light, so a pot looks like a sticker on the floor. A normal map tells the light which way each pixel faces. The side toward the torch lights up, the far side stays dark, and the pot looks round.
You don't have to draw one. The sprite's outline already says where its edges curve away, so you can compute the normal map from it.
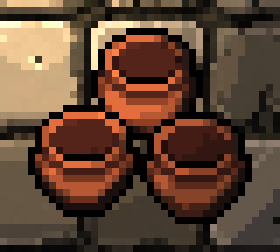
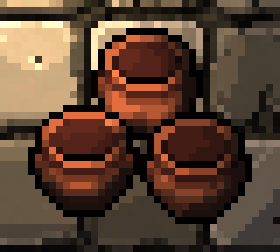
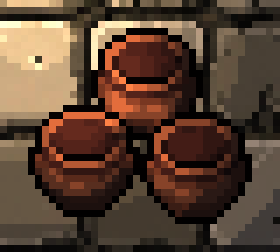
Same pots and the same torch in all three panels. The floor has no normal map, so only the pots change. The pots are a 32x28 pixel engine sprite, and nobody drew a normal map for them.
Brightness or outline
Here are two ways to get a normal map from a sprite without drawing it.
Brightness as height. Light pixels stick out and dark ones sink in. It's the classic trick, and it works well on stone, brick and bark, where the dark pixels really are the cracks. On a sprite the dark outline sinks in and the painted shading turns into bumps, so the surface gets texture but the shape stays flat.
Outline as height. The farther a pixel is from the transparent edge, the higher it sits. The edges curve away like the sides of a pot, and the light wraps around the shape.
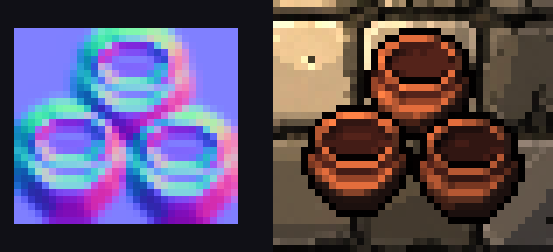
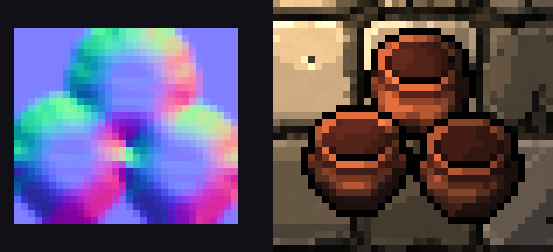
You can mix them. The code below starts from the outline and adds a little brightness on top, so the painted details still catch some light.
From outline to normal map
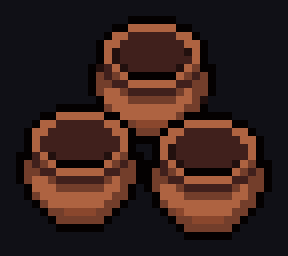
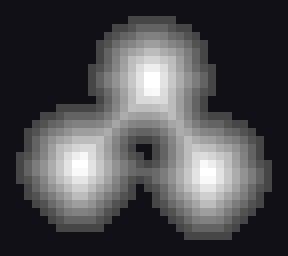
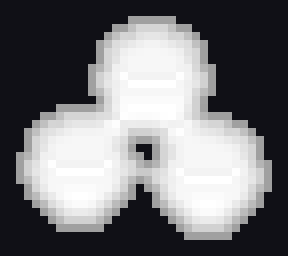
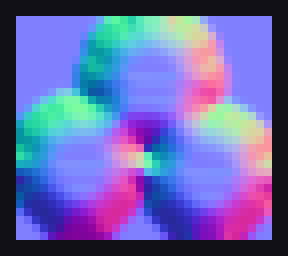
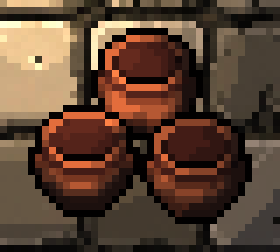
- For every pixel, measure the distance to the nearest transparent pixel. That's a distance transform, one call in most libraries.
- Turn the distance into height with a quarter circle over the first 5 px, steep at the edge and flat on top. For a sprite around 30 px, a top height of 12 px works.
- Add a little of the sprite's own brightness, so the painted details still catch some light.
- Take the slope of the height in x and y, and that's the normal. Blur the height a tiny bit first, so the slopes don't jump from pixel to pixel.
- Light it in steps. Round the light to 6 levels, so you get clean bands of color instead of smooth gradients that don't look like pixel art.
The code
import numpy as np
from PIL import Image
from scipy import ndimage


def outline_height(sprite, bevel=5.0, top=12.0, detail=1.5):
    """Height per pixel from the sprite's outline: a rounded bevel up from the transparent edge,
    flat on top, plus a little of the sprite's own brightness for surface detail."""
    a = np.asarray(sprite.convert("RGBA"), np.float32)
    inside = a[..., 3] > 127
    d = ndimage.distance_transform_edt(np.pad(inside, 1))[1:-1, 1:-1]  # the canvas border counts as an edge
    r = np.clip(d / bevel, 0, 1)
    h = top * np.sqrt(1 - (1 - r) ** 2)                # quarter circle: steep at the edge, flat on top
    lum = a[..., :3] @ np.array([0.299, 0.587, 0.114], np.float32) / 255
    h += detail * (lum - lum[inside].mean())
    return np.where(inside, h, 0)


def normal_map(height, blur=0.7):
    """Normals from the slope of the height, saved the usual way: x to red, up to green, z to blue."""
    gy, gx = np.gradient(ndimage.gaussian_filter(height, blur))
    n = np.stack([-gx, gy, np.ones_like(gx)], -1)      # image rows go down, so +gy faces up
    n /= np.linalg.norm(n, axis=-1, keepdims=True)
    return Image.fromarray(np.round((n * 0.5 + 0.5) * 255).astype(np.uint8))
pots = Image.open("pots.png")
normal_map(outline_height(pots)).save("pots_normal.png")
It runs once, when you export the sprite. The normal map is a regular PNG the same size as the sprite. For an animation, run it on every frame.
The bevel width decides how round things get. Narrow keeps a flat top with a rim, wide turns the whole sprite into a dome. 5 px suits a sprite around 30 px wide, so scale it with your sprite.
In Godot
The light with the 6 steps, as a canvas item shader:
shader_type canvas_item;

uniform float radius = 70.0;   // how far the light reaches, in pixels
uniform int bands = 6;         // light steps, so lit pixel art stays pixel art

void light() {
	vec3 to_light = LIGHT_POSITION - LIGHT_VERTEX;     // z is the light's height
	float falloff = pow(clamp(1.0 - length(to_light.xy) / radius, 0.0, 1.0), 1.2);
	float lit = falloff * max(dot(NORMAL, normalize(to_light)), 0.0);
	lit = ceil(lit * float(bands)) / float(bands);
	LIGHT = vec4(COLOR.rgb * LIGHT_COLOR.rgb * LIGHT_ENERGY * lit, LIGHT_COLOR.a);
}
To set it up:
- For each sprite, set the Sprite2D's texture to a new CanvasTexture. Put the sprite in Diffuse and the normal map in Normal Map, and set the texture filter to Nearest.
- Give every sprite the light touches a ShaderMaterial with this shader, the floor too. Sprites without a normal map are lit flat, so the steps match.
- Add a PointLight2D. Set Height to how high the torch sits above the floor in pixels (26 here), Energy to 1.6 and a warm Color. Give it a plain white texture, like a GradientTexture2D with both colors set to white, and make it big enough (Texture Scale) to cover what it lights. The shader does the falloff with
radius. - Add a CanvasModulate with a dark blue, around (0.24, 0.25, 0.33), for the shadows.
Green means up in the normal map, which is what Godot expects. If the light looks like it comes from below when it's above, flip the green channel.
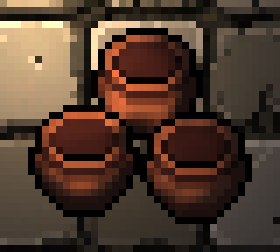
On the scene in this post, the Godot frames match the Python version within 1 of 255, in Godot 4.6. The only exceptions are a few floor pixels that sit right on the line between two light steps, under 1% of the frame.
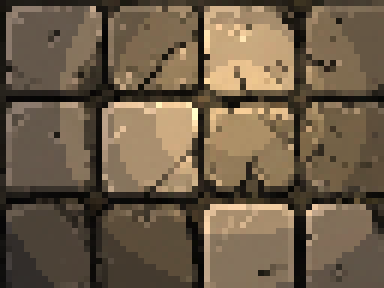
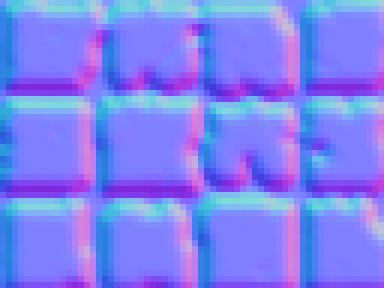
Floor tiles
A floor tile has no transparent edge. Use the dark gaps between the stones as the edge instead. Lay the tile out 3x3 so stones that cross the tile's border stay whole, treat the darkest 30% of the pixels as gaps, and keep the middle tile:
tile = Image.open("floor.png").convert("RGBA")
w, h = tile.size
floor = Image.new("RGBA", (w * 3, h * 3))
for y in range(3):
    for x in range(3):
        floor.paste(tile, (x * w, y * h))
gray = np.asarray(floor.convert("L"), np.float32)
stones = ndimage.gaussian_filter(gray, 0.8) > np.percentile(gray, 30)   # the darkest 30% are the gaps
floor.putalpha(Image.fromarray(np.uint8(stones) * 255))
floor_normal = normal_map(outline_height(floor, bevel=3, top=2.5, detail=1.0))
floor_normal.crop((w, h, 2 * w, 2 * h)).save("floor_normal.png")
A smaller bevel (3 px) and a low height (2.5 px) keep the stones flat with rounded edges. Change the 30% to fit your tile's gaps.
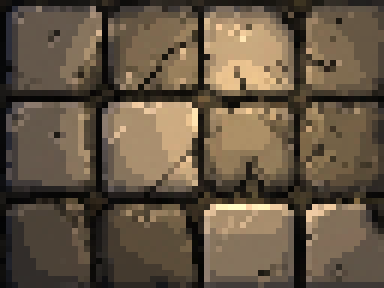
The video above leaves the floor without a normal map on purpose, so the pots stand out. Lit stones and lit props together can get busy.
Common pitfalls
The sprite touches its canvas edge. Tightly cropped sprites often do. A distance transform doesn't count the border of the image as an edge, so pixels along it get the wrong distance and that side of the sprite gets no bevel. On our barrel test sprite that was 56 of its 702 pixels. Pad the sprite by 1 transparent pixel first, as the code does.
Soft edges. The distance starts wherever the sprite turns transparent, so a soft or blurry edge moves it around. Use sprites with a hard edge. The code counts a pixel as inside above 50% alpha. If your sprites came out of a background remover with a ragged edge, clean the outline first.
Boxes turn into pillows. The bevel rounds every edge the same way, so a crate gets puffy sides. For boxy things, use a small bevel (1 to 2 px), or use brightness as height for them.
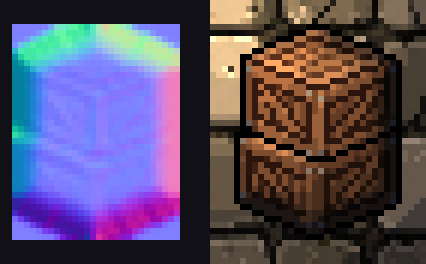
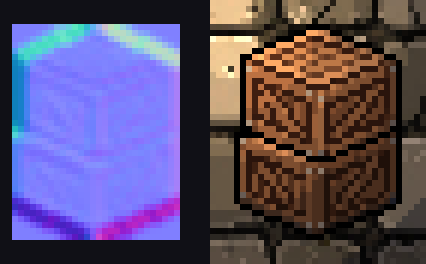
The light sits too low. Put the light well above the top of the bevel (26 px above a 12 px top here). Too low and every side that faces away from it goes dark, so the sprite looks darker instead of rounder.
Smooth light on pixel art. Without the steps, the light paints soft gradients across hard pixel art and it looks like a filter on top. Six steps is a good start. Fewer looks more like hand shading, more looks smoother.
Where to next
- 2D shadowcasting for torchlight, fog of war and line of sight, so the torch stops at walls
- Pixel Engine Image, for sprites at the exact size you need with a hard transparent edge
- Atmospheric perspective for 2D parallax backgrounds, another per-pixel trick for depth in 2D
- Wang tiles, explained, for ground that doesn't show its tile grid